King Shocks Rebuild Instructions How to Re-Valve and Rebuild King Shocks.
Filthy Motorsports is not only one of the largest and most specialized King Shocks dealers in the world, but we also offer genuine King Shocks replacement parts and provide helpful technical support to help you service, rebuild, revalve, and customize your shocks. Here is a basic overview of how to service King Shocks:
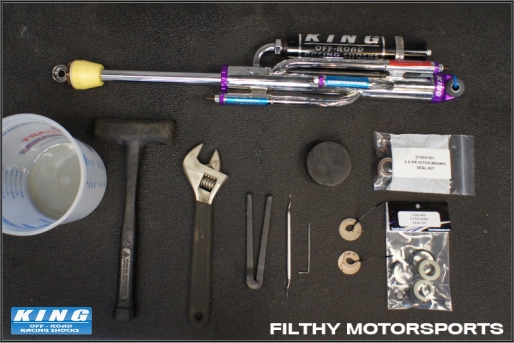
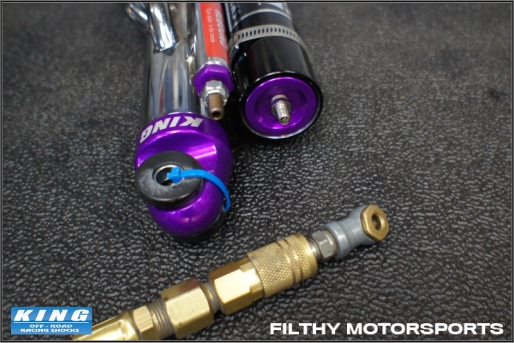
Step 1: Clean The Shock - Clean the shock completely using paper towels or a shop rag to remove any and all dust and dirt. Do not bleed the nitrogen pressure from the shock just yet.
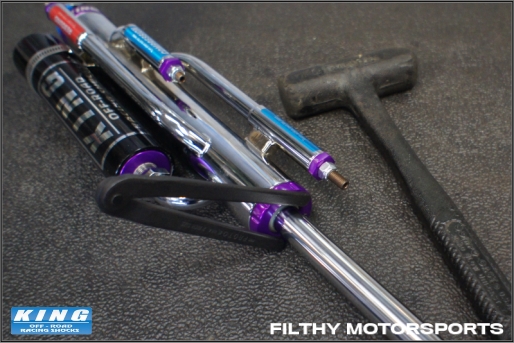
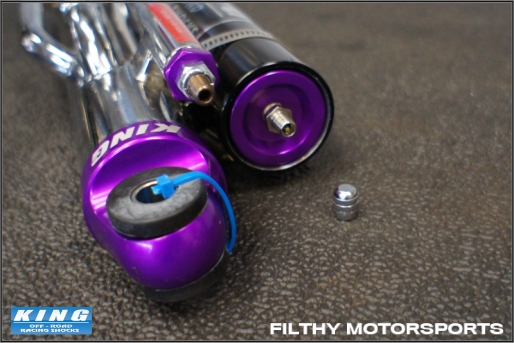
Step 2: Loosen Set Screw - With the shock shaft fully extended, use an allen wrench to loosen the set screw in the lower wiper cap. Make sure the allen wrench is a good fit so as not to strip the screw. Unscrew it just a few turns.
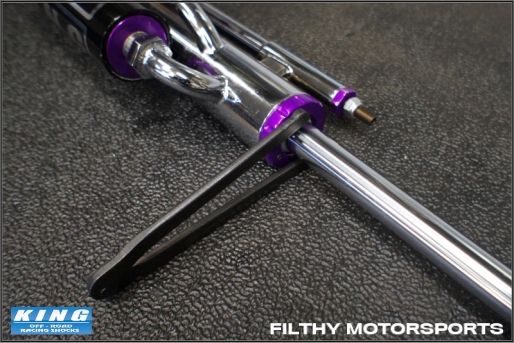
Step 3: Loosen the Wiper Cap - Set the spanner wrench securely into the two indented holes on the wiper cap and using a medium amount of force turn the wiper cap counter-clockwise. A small tap with a dead blow hammer usually does the trick. Do not remove the wiper cap in this step, only loosen a few turns. Nothing in this rebuild process should require more than a small to medium amount of force and everything should come apart smoothly.
Step 4: Bleed the Nitrogen Pressure - Bleed the pressure from the reservoir or shock body on an emulsion shock through the Schrader valve using a small screwdriver or allen wrench. If you have a valve core tool, we recommend removing the valve core from the Schrader valve.
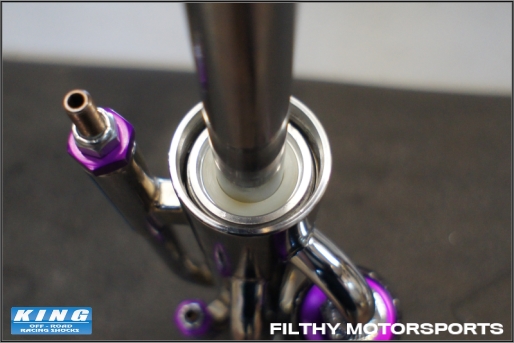
Step 5: Unscrew the Wiper Cap - Finish unscrewing the wiper cap and slide it up to the end of the shock shaft.
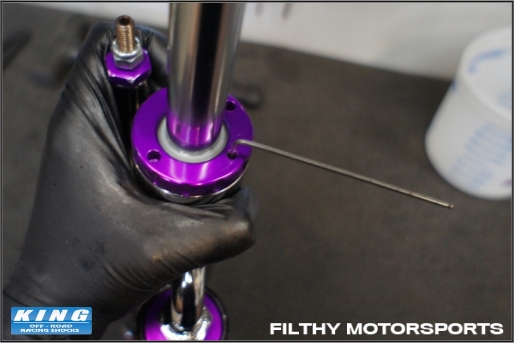
Step 6: Lower the Seal Cap - Press down firmly on the internal seal cap to push it down below the snap ring.
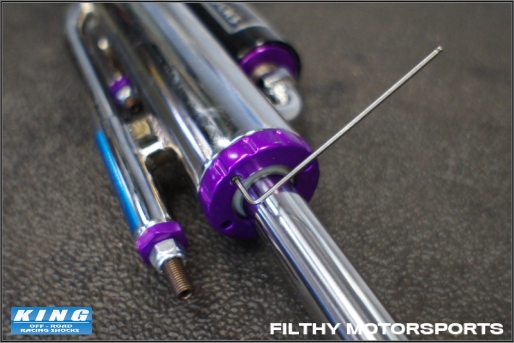
Step 7: Remove the Retaining Ring - With a small screwdriver or dentist pick, remove the retaining ring and set it aside.
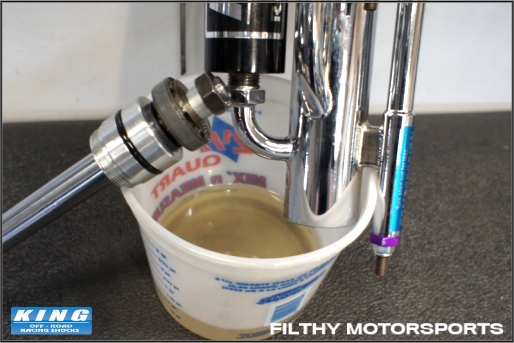
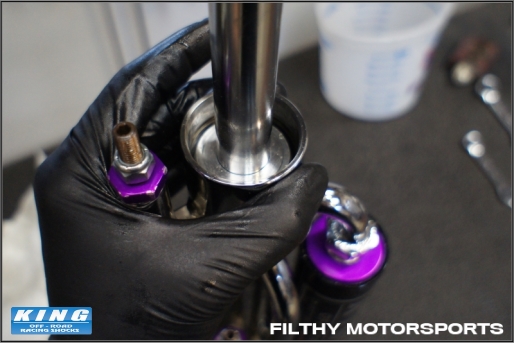
Step 8: Remove the Shock Shaft - Carefully pull on the shock shaft to remove it from the shock body. Sometimes the shaft comes out easily and other times you may be fighting a tight vacuum so be careful, take your time, and expect to make a mess.
Step 9: Drain the Oil - Drain the oil from the shock into a clean container. For bypass shocks make sure the bypass valves are open so the oil can drain from the bypass tubes. For remote reservoir shocks lift the reservoir up to drain the oil from inside the reservoir and reservoir hose. For piggyback reservoir shocks lean the shock body such that the oil can drain from the piggyback reservoir into the shock cylinder and then turn the shock over and let the oil drain out. Inspect the oil for unusual debris or metal shavings and inspect the shock shaft and cylinder walls for scratches and damage.
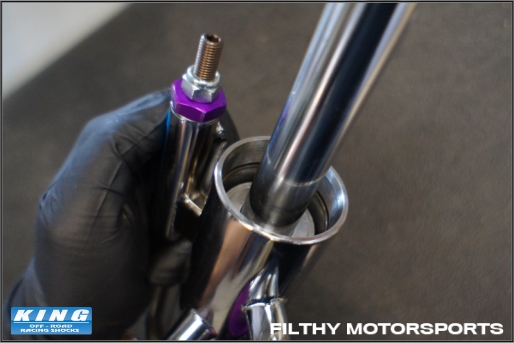
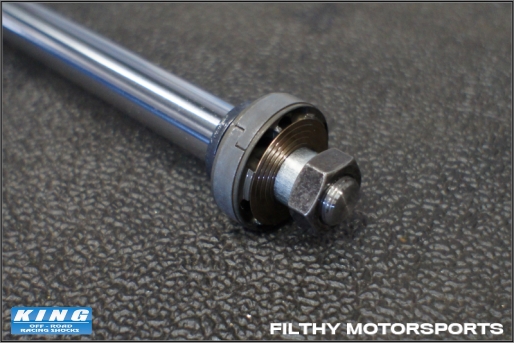
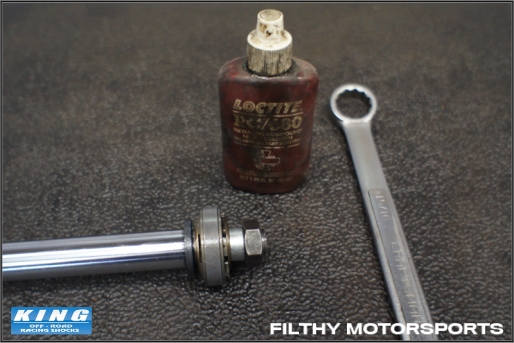
Step 10: Remove the Piston Retaining Nut - Secure the lower rod end (bearing side) of the shaft assembly in a vice and protect it with a towel or rubber pad, then remove the piston retaining nut. The wear band on the piston only needs to be replaced if excessive wear is visible. Never clamp the shock shaft in a vice without proper soft jaws, shock shaft clamps, or a shop rag.
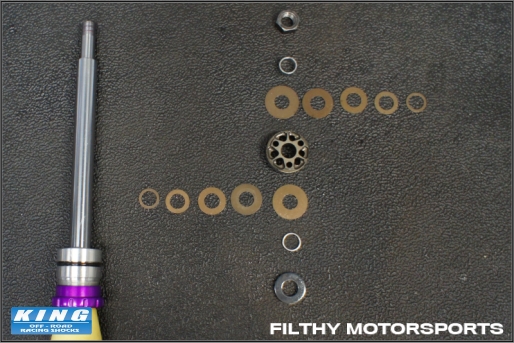
Step 11: Remove the Piston and Shims - Carefully remove the shock piston, shims, and spacers and lay them out in order.
If you are revalving your shocks, then this is the time to replace the existing shims with the new ones. Remember that compression shims go on the bottom and rebound shims go on the top, towards the nut. For help choosing new shims, check out this
Shock Tuning Guide. If you are not replacing any seals, then the seal cap and wiper cap should stay on the shock shaft.
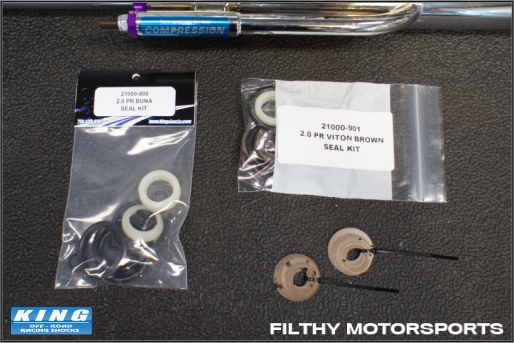
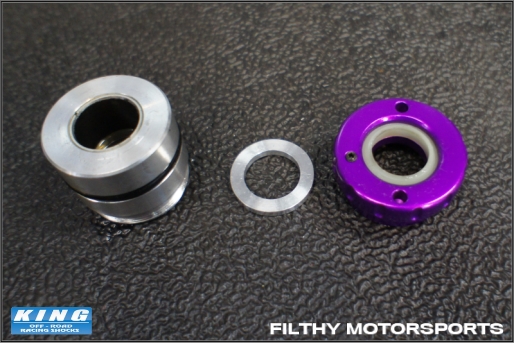
Step 12: Replace Seal Cap Seals - If you are performing a shock rebuild, remove the seal cap, spacer, and wiper cap from the shock shaft. Remove the existing seals and o-ring carefully using a small screwdriver and/or small pliers. The new seals are a tight fit but will push in by hand without needing much force. Take your time to make sure they are fully seated correctly.
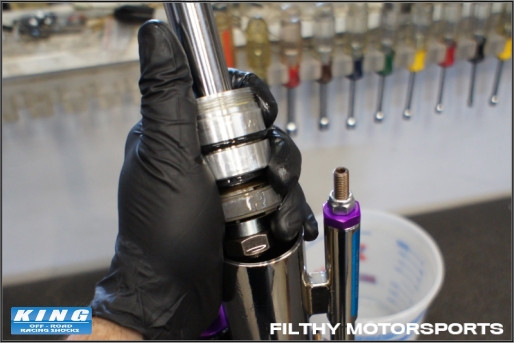
Step 13: Reassemble the Shock Shaft - Slide all of the shock shaft components back onto the shock shaft in the reverse order in which they were removed.
Apply a small drop of Loctite (thread locker) to the shaft threads before tightening the piston retaining nut snugly.
Set the shock shaft assembly aside for now.
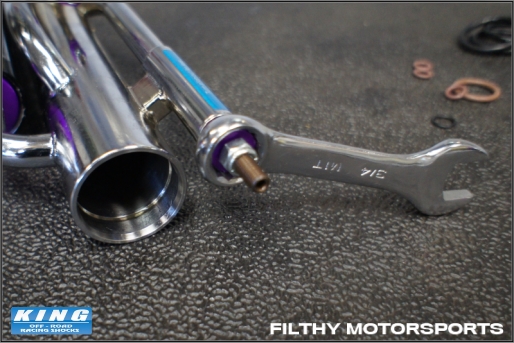
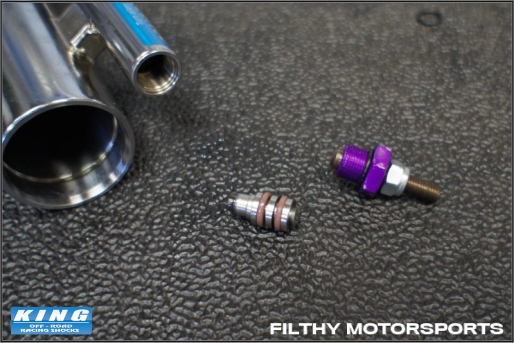
Step 14: Remove Bypass Tube Valves - Remove the bypass tube valves by unscrewing the larger of the two nuts. These nuts may be a little tight and may require some force so use caution.
Step 15: Replace Bypass Valve O-Rings - Using small pliers, remove the bypass valve from inside the bypass tube. Replace the o-rings and then reinstall the valve and nut. Make sure that the valves remain open to allow air to bleed through them during the oil filling process coming up soon.
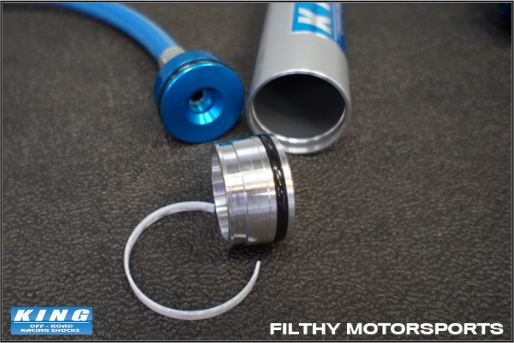
Step 16: Reservoir Rebuild - Press down/in firmly on the reservoir end cap to expose the retaining ring and remove it using a small screwdriver or pick. Remove the end cap by pulling on the Schrader valve, preferably using a tire inflation extension or valve stem puller. The other reservoir end cap can be removed in a similar fashion. Replace the o-rings and reassemble.
Step 17: Set the Reservoir IFP - Charge the reservoir with a small amount of pressure to push the internal floating piston to the bottom of the reservoir cylinder. Then, release the pressure from the reservoir so that it is empty. Another option is to remove the reservoir end cap and pushed the IFP down manually.
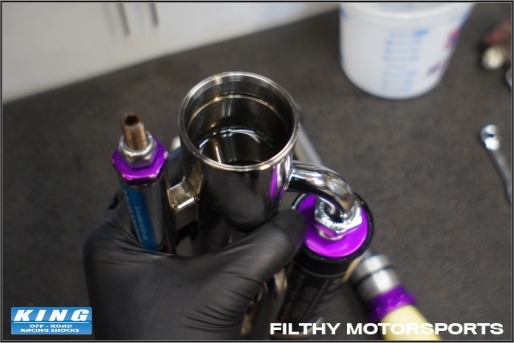
Step 18: Fill the Shock Cylinder with Oil - While holding the shock cylinder upright, pour the shock oil into the cylinder until it reaches a point about one inch under the snap ring groove.
For Emulsion (Non-Reservoir) Shocks - Use these oil volumes instead.
2.0 x 6"
195 cc
2.5 x 6"
400 cc
2.0 x 8"
250 cc
2.5 x 8"
510 cc
2.0 x 10"
320 cc
2.5 x 10"
640 cc
2.0 x 12"
400 cc
2.5 x 12"
800 cc
2.0 x 14"
450 cc
2.5 x 14"
900 cc
2.0 x 16"
500 cc
2.5 x 8"
1000 cc
Step 19: Cap and Flip the Shock Cylinder - Using your hand or any clean flat block (a hockey puck works well), cover the open end of the cylinder and turn it upside down and back a few times to release any trapped air bubbles. For remote reservoir shocks, let the reservoir hang downward. Add shock oil as needed to bring the oil level back to around one inch below the snap ring groove.
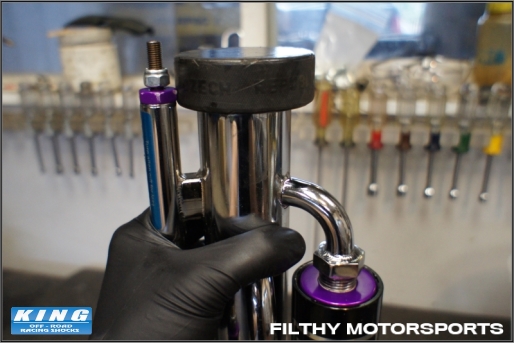
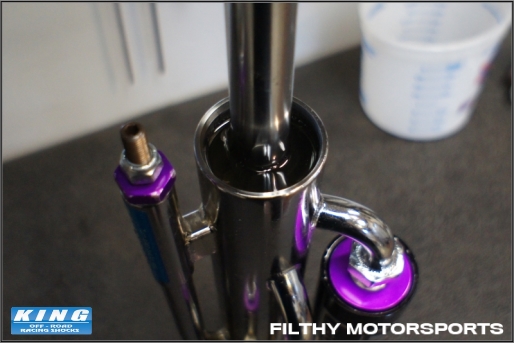
Step 20: Slowly Insert the Shock Shaft - Carefully place the shock shaft assembly into the shock cylinder until the entire piston is submerged. Move the shaft up and down slightly and let any remaining air bubbles work their way out. The oil level should be at the retaining ring groove (if not, add more oil).
You may also want to tap the top of the shat with a mallet as this will allow any air trapped in the piston and under the valving shims to escape.
Step 21: Set the Seal Cap - Slide the seal cap down to the top of the cylinder and settle it down so that it is sitting on top of the shock oil. Ideally, a small amount of shock oil will seep out over the cylinder wall.Then, push down on the seal cap with moderate force to move it down to just below the retaining ring groove. Try and do this in one continuous push because this is how oil is forced into the reservoir. Finally, insert the retaining ring into the groove.
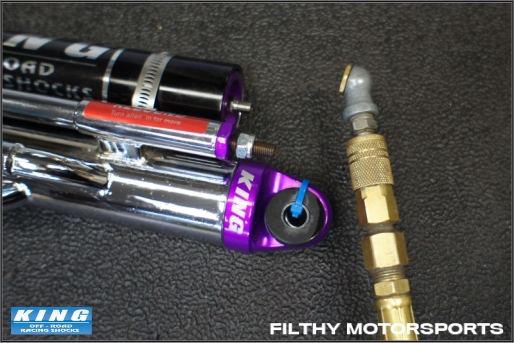
Step 22: Charge the Reservoir - Charge the reservoir using a nitrogen fill kit made up of a pressure regulator, connection hose, and an air chuck to the desired pressure (about 150 PSI) and then check for leaks.Sometimes this pressure will push the main seal out of the seal cap. If this happens, carefully push in back into position. The wiper cap will eventually hold it in place.
As an Amazon Associate, we earn a small commission on purchases which does not affect your pricing.
Step 23: Screw on the Wiper Seal - Thread the wiper seal onto the now seated wiper cap and tighten securely using the spanner wrench. A few light taps with a dead blow hammer may help.Do not over tighten the wiper cap.
Step 24: Tighten the Set Screw - Tighten the set screw to secure the wiper cap. Wipe off any residual oil and cycle the shocks a few times by hand, it should move freely although with some resistance through the entire stroke. If you hear a lot of gurgling, then there is air in the cylinder and you will need to repeat steps 21-24. Trace amounts of air are ok as they will eventually move their way through the reservoir and past the internal floating piston.
This website uses cookies or similar technologies to enhance your browsing experience and keep items in your shopping cart. By continuing to use our website, you agree to our Privacy Policy